
Hello my fellow mobile users. I hope you all enjoyed a great New Year celebration (if you follow the Gregorian calendar) or a good summer break ( for those of you in the south hemisphere) .
For me I've been enjoying the snow. Lot's of snow.
So, new year, new challenges, new horizons. To kick off I'll start the year explaining a question that is very common and has caused a lot of issues for many Nokia users. I'm talking about How to display Album Art in the Music Player.
As I've explained on several occasions there's more than 1 way to do this (isn't this the case with many things in Nokia devices?).
I'll start with the simplest one then move on to other options.
LINK THE ALBUM ART IN THE PHONE
1) Find the Album cover pictures and save in the phone (you can use Search and Images to find them on the internet or Google Image).
2) In the Music Player navigate to the ALBUM view and select the ALBUM whose picture you downloaded.
3) Select OPTIONS -> ALBUM ART.
4) Then OPTIONS -> CHANGE
5) Now locate the picture you want shown.
6) You are now done!
There are some drawbacks to this. For one, if you move the file or delete it then the album art doesn't follow. The Album art pictures stay in the phone and show in the Photos or Gallery.
ADD ALBUM ART TO METADATA
Another option would be to add the picture to the Metadata before transferring the files to the phone.
There are many ways to do this, there are Metadata editors like Tag&Rename, but also WinAmp and Windows Media Player allow you to edit the metatada in an easy way.
Some things to keep in mind:
1) Use JPEG or PNG files (BMP and GIF sometimes are not displayed)
2) Keep the filesize to less than 200 KB. Although larger pictures may work, there's no point in having large files as the thumbnail displayed is rather small. A 300x300 or 600x600 rez picture is more than enough.
3) Make sure that the picture is tagged as Album Cover Front not as User Defined or other tag. This is important as only the Cover Front is displayed by the Music Player.
4) Don't add more than 1 picture to the file. For some reason if there are more pictures then none are displayed.
5) Don't use MTP sync to transfer files (PC SUITE mode or MEDIA/MUSIC mode) as this may cause the Album art to dissapear.
Once the files have the album art attached then use mass storage to load them to the phone.
TIP: If you already had the song in the Phone. FIRST delete it, REFRESH the library, then re-load it. This will cause the Music Player to find the METADATA again and then find the album art. If you just replace the song with the one with album art the Music Player may not refresh the Album art!
Showing posts with label pictures. Show all posts
Showing posts with label pictures. Show all posts
Friday, January 9, 2009
Monday, March 3, 2008
Add thumbnail to Video Center
How to add thumbnails to Video Center.

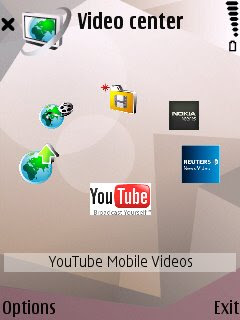
Since the N95 we were introduced to video Center, a Nokia application that allows you to access Video feeds, do syndication (video podcasts) and also download and manage videos. If you've never seen it, it looks like this:
Some things to remember is that you need to set-up how Video Center access the internet for most of the things to work.
But I'll talk about Video Center in some future post, for now I want to show you how you can put your own thumbnails for the videos shown in the Video Center (My Videos) folder.
It's quite simple.
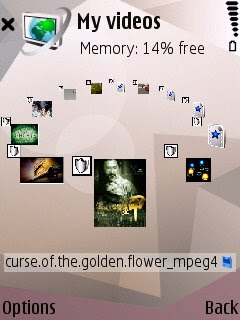
On newer software (N95 v20, N82 v11), Video Center will try to create a thumbnail on its own, but if you loaded your pictures as described above it will use the picture instead of the thumbnail it creates. In fact if you are experiencing problems of video center closing by itself it may be because it cannot create a thumbnail. If this is happening load a picture to each video file you have as described above and the problem will be fixed.
* If you don't know how to edit a picture file then leave a comment. Windows comes already with a couple of simple tools to edit pictures and there are 1000s in the web.

Since the N95 we were introduced to video Center, a Nokia application that allows you to access Video feeds, do syndication (video podcasts) and also download and manage videos. If you've never seen it, it looks like this:

Some things to remember is that you need to set-up how Video Center access the internet for most of the things to work.
But I'll talk about Video Center in some future post, for now I want to show you how you can put your own thumbnails for the videos shown in the Video Center (My Videos) folder.
It's quite simple.
- Get your video
- Get a picture file for your video. JPEG, PNG or GIF (but no animated gif)
- Make the picture into a thumbnail of 320x240 or 240x320 in size. Size is important, you can go even lower rez. the actual picture that's displayed in the screen is only about 70 pixels tall. The only thing important is to make it in an aspect ratio of 4:3 (1.33333). Other aspect ratios WILL work but the icon will show smaller*.
- Rename the picture EXACTLY like your video file. Pay attention to the letter case as it has to match. (Video.mp4 and video.jpg will not work, it has to be Video.jpg)
- Now that you have the picture and the video file, copy it to the My Videos folder on your Nokia Nseries.

On newer software (N95 v20, N82 v11), Video Center will try to create a thumbnail on its own, but if you loaded your pictures as described above it will use the picture instead of the thumbnail it creates. In fact if you are experiencing problems of video center closing by itself it may be because it cannot create a thumbnail. If this is happening load a picture to each video file you have as described above and the problem will be fixed.
* If you don't know how to edit a picture file then leave a comment. Windows comes already with a couple of simple tools to edit pictures and there are 1000s in the web.
Tuesday, February 26, 2008
N96 Pictures
Well this is probably old news for some of you, but here are some pics from the N96.


 Hope you enjoy!


 Hope you enjoy!
Subscribe to:
Posts (Atom)

FREE TRIAL


 3GP Converter
 DVD to MP4 Suite
 DVD to 3GP

 DVD Ripper